
Bleaching the Seed
Prior to plating your orchid seed a couple of preparatory steps are important.
When collecting orchid seed it is important to try to eliminate or reduce bacterial/fungal contamination. It is best to collect orchid seed from seed pods which have not begun to dehisce their seeds. This promotes contamination. If you do collect dehiscing seed keep it separate. In obtaining seed from seed pods you want to collect mature seed. In most species the seed pods will change from a green color to yellow to brown color when the seed is mature. In some species, mature seed can be obtained from pods which are still green but this is a species specific trait. Slice open mature pods with a razor blade and letting the seed spill under a piece of 8" X 11" white printer paper. Avoid getting extraneous seed pod parts as this may contain contamination. Let the seed dry for 2 days. Collect the seed in small glass vials or plastic vials. Glass vials are preferred since they don't hold a static charge like plastic vials do. Store your seed filled vials in a moisture proof container which contains a beaker of anhydrous calcium chloride. The Calcium chloride will maintain the humidity of the moisture proof container at about 15% humidity. This is desireable. Seed stored in this constant humidity container will remail viable for several years depending upon the species (5 years at least for Cypripedium reginae).
Orchid seeds contain an embryo and a covering called the testa. The embryo is often white in color but can be other colors as well, The testa can be clear to brown to black. Most of the color resides in the testa. The testa is typically very hydrophobic in nature. When seeds are placed in water, they float on the surface because of this. This hydrophobic nature makes any chemical treatment of the seed very difficult. The seeds can be "wetted" (= made hydrophilic) by applying any one of several compounds called surfactants. A common surfactant is a complex organic compound called Tween 20 (Phytotechology labs product P720). Place your seed in a 100 ml glass jar containing 25 ml of water and 6 drops of Tween 20. Attach your jar to a hand-powered vacuum pump (available from auto part stores). Apply a vacuum of 25" Hg to the seeds for 2-3 hours. Release and re-apply the vacuum numerous times swirling the seeds while doing so. The seeds can now be bleached or stored overnight in a frig before bleaching. This procedure does not need to be done aseptically. See photo below for the vacuum setup.
Before plating or sowing your orchid seed, it must be bleached. There are two reasons for this. First, the seed will contain bacteria and fungi which will grow profusely in the rich medium in which you sow your seeds. Sometimes even with prolonged bleaching, contamination of your media will occur. In general, fungal contamination is more critical because the growth of fungi is faster and can over run a seed plate in less than 1 day. Second, many temperate zone orchid seed are dehisced in a dormant state which must be broken if the seed is to germinate. People speculate that the embryo contains compounds called "dormins" which inhibit germination. Honestly, no one has ever seen or detected one of these dormins. But, to the point, bleaching the seed can break this dormancy. The length of time necessary to break seed dormancy is dependent upon the species and can vary from 5 minutes in the genus Ophrys to 1 hour in Cypripedium reginae. Bleaching time is critical because too little bleaching won't break seed dormancy but too much bleaching will kill the embryo. This is a fine line. How do you determine bleaching time? Three ways 1) ask someone who has already worked with this species 2) consult the literature 3) divide your seed in batches and bleach for various intervals. Also, when bleaching your seed you can aliquot a small sample of your bleaching seed and watch it under a microscope. In general, the seed is bleached enough when all of the color in the testa has disappeared and any coloration in the embryo has disappeared and the embryo begins to turn white if not already white. This takes experience.
Orchid seed bleaching in the U.S. is typically accomplished with a solution of sodium hypochlorite (NaOCl)(Europeans often use Calcium hypochlorite). This is commonly referred to as "Chlorox" bleach. I typically use a 0.525% sodium hypochlorite solution which is made by adding 1 part chlorox (5.25% sodium hypochlorite) to 9 parts water. This is simple except that the stupid Chlorox Corporation keeps changing the concentration of sodium hypochlorite in their bleach. The present chlorox bleach now contains 8.25% sodium hypochlorite. So, to make the original 5.25% chlorox bleach add 65 ml of 8.25% bleach to 35 ml of water. Now, dilute the 5.25% bleach 1 to 9 as described above. In a way it doesn't matter what the concentration is if you are watching the seed during the bleaching process. However, it you are using a certain protocol it is convenient just to time the bleaching process rather than watch the seed.
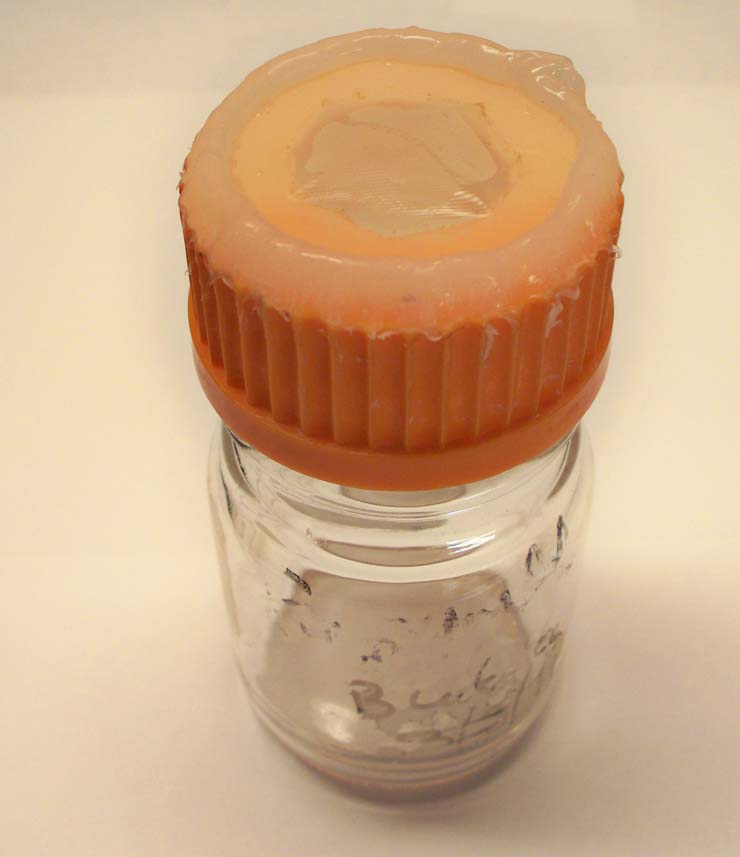
In my situation bleaching is carried out in a specially designed "filter sterilizing jar". This is a regular 100 ml jar in which a portion of the cap has been replaced with a fine mesh Nitex material. The mesh of this mesh is fine enough to retain all orchid seeds that I have dealt with. See photo below of this filter jar.
Here is the procedure:
1. From this point onward the procedure must be a aseptic one with the wearing of sterile gloves, using a laminar flow hood or sterile glovebox. Rinse gloved hands often with 70% alcohol.
2. Remove the filter cap from filter sterilizing jar and wet the inside of the filter with sterile water from a squeeze bottle.
3. Pour the prepared seeds from the 100 ml jar into the filter cap collecting the filtered water in a waste jar. The filter cap now contains your seeds for bleaching.
4. With the filter sterilizing jar in an inverted position screw on the seed-containg filter cap. Turn filter jar right side up. With squeeze bottle filled with your bleach solution rinse your seeds down into the filter sterilizing jar. Use about 25 ml of bleach. After the seeds are in the bleach solution in the filter sterilizing jar it is a good idea to remove the filter cap and rinse the inside with additional bleach solution (some seeds get caught up into the filter cap). It is also a good idea to rinse the sides of the jar with additional bleach solution. Bleach the seed for the necessary time. One can remove a small batch of the seed and watch the bleaching process under the microscope.
5. At the end of the bleaching process, unscrew the filter cap and pour the seeds through the filter. Rinse the filter jar three times with sterile water and pour it each time through the filter cap with the retained seeds. Screw the filter cap onto the filter sterilizing jar with the jar in an inverted position. Re-invert jar and add sterile water through the filter cap with the squeeze bottle rinsing the seeds back down into the filter sterilizing jar. Rinse seeds in this new sterile water for 10 minutes.
6. Repeat the rinsing process 2 more times with the rinse period of 10 minutes each.
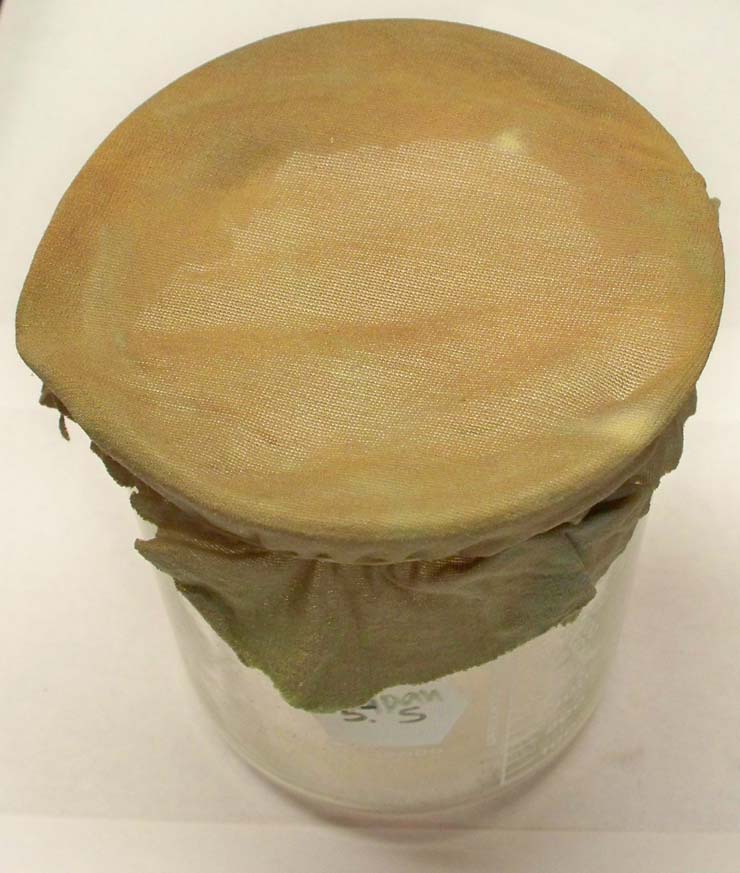
7. After the last rinse remove the filter cap and, pour the sterile water containing the rinsed seed from the jar onto the panty hose filter (previously autoclaved). The panty hose filter is a portion of the upper section of women's panty hose stretched over a 1000 ml beaker secured by a rubber band. This panty hose filter will retain all of your seeds. Remove the panty hose filter containing the seed from the beaker and place on a level dry surface in your glove box or laminar flow hood. Let the seeds dry. This usually takes about 3-4 hours.
8. Plate your newly dried bleached seed. If you are using a 150 mm petri dish filled with medium you can simply gradually shake the seeds from the panty hose filter onto the petri dish. Or if using some other type of culturing vessel you can use a spathula and transfer the seeds. If using the petri dish method, use parafilm sealing tape to seal the two halves of the petri dish. Parafilm keeps out pathogens and keeps the petri dish from drying out. See photo below of the panty hose filter.
9. For most species, incubate your seeds in the dark at room temperature. Some species can be, or must be, incubated in the light. Some species must be incubated at less than room temperature.
10. The most important step of all. Check your plates or culture vessels every 12 hours for the first 7 days for bacterial or fungal contamination. With a sterile spathula or other instrument you can remove the contamination by slicing and lifting the contaminated section away. This is reasonably easy with the petri dish method because of the shallowness of the petri dish. From day 7 to day 14 check your cultures once per day. Usually after 14 days any bacterial or fungal spore or propagule will have germinated. However, I found plates contaminated after several months.